Demystifying 3D Printing
A little introduction about Satellite communication, its key components and how it works
Posted by Simar Mann Singh on 22 Dec, 2019
Introduction
3D printing has been catching a lot of heat lately. Not only are there many traditional 3D printer which used to print 3D objects from different types of plastics or polymer, but also are there quite a lot of different types of 3D printers which makes edible cakes, which can make houses and what not.
The technology of 3D printing is not new. It dates back to 1970’s when David E. H. Jones laid out the concept of 3D printing in his regular column Ariadne in the journal New Scientist. However, even till today, not many are aware of the term “3D Printing”.
In this blog post, we’ll try to simplify the obscure techno trend called 3D printing.
Types
3D printing is an Additive machining process which means to create a 3D object, small amount of material is added in every layer, unlike Subtractive machining process where small amount of material is scrapped off from a chunk of raw material in order to achieve the desired shape and size. There are different materials that can be used to print and based on the material, printing process also differs to suit different properties of the material like strength, temperature tolerance, strength-to-weight ratio and many more. Most popular materials when it comes to affordable 3D printing are PLA, ABS, Resin, ASA etc which all work on Fused Filament Fabrication (FFF) method which is commercially also popular with the name Fused Deposition Modelling (FDM).
Form Factor
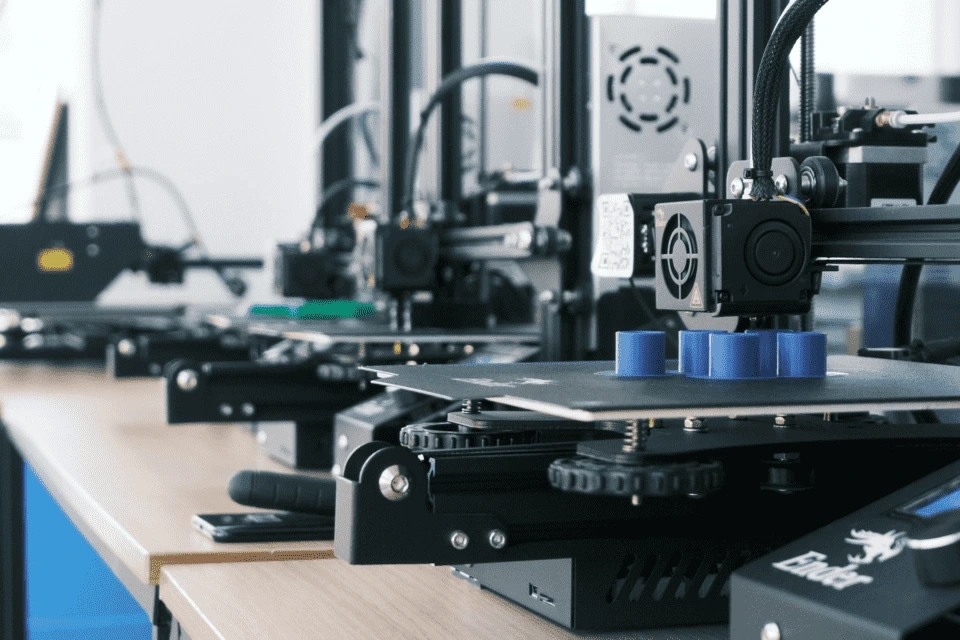
3D printers now-a-days come in various form factors. You can get a 3D printer all enclosed in cubical frame fitter with a protective glass, alternatively you can also get an open frame 3D printer which doesn’t have any enclosure. As a matter of fact,there are companies which can 3D print you an entire house. And quite obviously, we need giant 3D printers for such a herculean task and those 3D printers can’t be enclosed. Printers are also classified as Bowden printer and a Direct Drive printer. Both types of printers use some kind of extrusion mechanism to feed the filament to the hot end but the placement of the extrusion mechanism in a printer has to do it all. In Bowden printer, the extrusion system is followed by a tube which carries the filament to the hot end and the hot end while in the direct drive printers, extruder is just followed by the hot end, hence eliminating the need for any tube to carry filament to the hot end. Both the printers have their own pros and cons but many of the aberrations in 3D printing can be sorted out using direct drive printers.
Cost
You can get a 3D printer for as low as 150 Euros and for as much as 100,000 Euros. Cost entirely depends on how good the print quality of a printer is. It certainly depends on various other factors like to what extent the printing process can be automatized. For instance, in a cheap 3D printer, you need to perform Bed-leveling manually while a decently priced printer can perform such task automatically on a press of a button. And believe me, manual bed-leveling is definitely not something you would love. If the print bed is not properly leveled, it would screw you prints and you might not be able to pin-point (at least beginner) as there could be a lot many factors responsible for weird and pathetically looking 3D prints. It certainly pays off to have certain features automatized in your 3D printer but if you are short for money, you would just have to invest more time in unnecessary tasks. So basically trade-off is between Money you spent and comfort you get in return.
Also, if you consider cost per piece for the 3D printing process, it stays quite a lot stable and unlike other manufacturing processes, 3D printing is pretty much independent of the quantity you print. Following figure gives you a brief idea.

Jargons
This section explains what those 3D printing Jargons mean.
Extruder : The extruder consist of two sections – cold end and hot end. This is the unit which pushes the filament towards the hot end of the 3D printer where the filament gets melted.
Filament : It is the raw material, shaped like a wire which is fed to the extruder and eventually to the hot-end. Usually, it comes as a spool weighing 1kg, 2kg and so on. Most people don’t care about the net weight of the filament while buying a spool. Many sellers count the weight of spool holder as well in the 1kg they mention on their website, thereby actually providing less filament just to increase their profits. Such malpractices need to be stopped.
Hot-End : This part is the heart of a 3D printer. It melts the filament at temperatures ranging from 190-220 degree Celsius. Different materials provide best results at different temperatures. For example, PLA gives best results at relatively lower temperature (~180-190 degree Celsius), while for ABS, you might need to increase the printing temperature to around 210 degree Celsius. That is because the molecular structure of different materials takes quite different energy values to break structural bonds.
Bed : The even surface where the part is placed while printing is called Bed. It is heated as the part needs to stick to the bed, other-wise the part might flip and fall down (even while printing) when the hot-end moves.
Tweaking
For slicing the 3D models, many softwares are available in the market. One specific software which is both open-source and free is Cura. Cura is used by a lot of people and is also my personal favorite. Why exactly, you may ask. Its because it offers so many options to tweak and plugin options that it render other competitor softwares useless in front of Cura.
While many tweaks are optional, but there are some essential tweaks that can save you a lot of material and time that it takes to print, thereby increasing the efficiency. Below is a list of some tweaks that you can do on the software side:-
-
Canonical Support
This is a really interesting feature which I don’t know why many people are oblivious to. What it does is, it creates the support for any overhang in a canonical shape instead of regular cuboid shape. So, the point which sticks to the heated bed has very small cross sectional area while it gives complete cover to the base of the overhang as shown below.
Now, compared to a regular support shown below, it saves a lot of material and time that it takes to print the object while still providing support to the overhang. But be aware that it is still an experimental feature yet (at least at the time of writing this blog). So you have to check out this feature in experimental section. However, it requires you to check “Enable Support” first. Consider it as a prerequisite for this.

Here’s how you can enable it.
Go to Experimental Features -> Canonical Support and check it as well
- Break up Support in Chunks
It turns out that shaping the support structure in a canonical form is not the only way to reduce the material used for printing supports while still providing essential functionality. Breaking up support into chunks further reduces the material used as it creates separation between the support structure. As of now, this feature is also an experimental feature which is why to enable it, you need to go to experimental features and then check the enable support option first. -
Coasting
In order to reduce the stringing effect, coasting can help by replacing the last part of an extrusion path with a travel path. It takes into account the Linear advance method.The concept is, that the oozed material is used to print the last stride of the last piece. This causes less stringing effect. This feature is specifically useful for Bowden printer setup and doesn’t benefit that much to direct drive printers.
- Fuzzy Skin
If you want your 3D printed part to have a rough outer look, you can obtain so by enabling the Fuzzy Skin. It randomly jitters while printing the outer wall which creates a fuzzy look on the outer skin - Adaptive Layer
This feature allows you to print different parts of your object at different layer height depending on how much detail it needs. - Per Model Settings
In Cura 4.4, if you happen you have multiple objects on your build plate, you can have different settings for both the objects. All you need to do is select the 3D object and then go to per model settings (on the left side of screen), click on the normal mode and then basically select the setting which you want to change for that specific object e.g, infill density. So you can set infill density as 10% for one object and perhaps like 20% for other object. This feature allows you to basically have personalized settings for each 3D model present on build plate. You can also select different modes like “print as support” for one object and it will not generalize this setting for all the models present on build plate.
What to look for when buying a new 3D Printer
When it comes to buying a new 3D printer, you need to check for a lot of things before making the final decision. Following is a brief exhaustive list of points to note :-
-
Build Volume
Printers having large build volume certainly allow you to print big 3D models as a single piece, but large build volume comes with a price tag. However, If you are a student or sparing enough money might take some time, you can go for small 3D printers having small build volume as they tend to be cheap (ignoring that you want all the top notch features like automatic bed leveling etc.)There are many affordable 3D printers in the market which offer quite decent build volume. One example of such a 3D printer is Ender3 by the company Creality.
- Print Speed
Many 3D printer companies advertise their product as having fast print speed. But wait, there’s a catch. They mention the maximum speed at which the printer can operate and still manage to provide acceptable prints. But, printing at maximum speed often causes Layer Shifting, a phenomenon which causes the layers of the printed object to shift from their intended positions. A lot of problems associated with 3D printing can be mitigated by rolling back the speed. So, don’t be flattered with high print speed of a 3D printer. You might not even use it. Its just like the automotive companies advertising top speed of their automobile intended to be driven in cities. With increasing traffic, where exactly would you use that top speed? - Method of Extrusion
3D Printers can have one of the two possible type of extrusion system – Bowden tube and Direct drive. Bowden tube extruders causes some serious issues like Linear advancement which Direct Drive extruders don’t have, but in a direct drive extruder, filament is more prone to breaking. While a printer having Bowden tube exruder can print faster with greater accuracy as the print head doesn’t have to carry the weight of heavy stepper motor, printers having direct drive offers less stringing and linear advance along with option to print wide range of materials. - Ease of Assembling
Many printers offer over 90% pre-assembled printers like AlphaWise which provides ease of assembling as you can start printing within 30 minutes of opening the package but again like always, Comfort comes with a price tag. You might have to shell out more bucks for an AlphaWise printer than you can need to pay for an un-assembled printer from, say Creality (e.g, Ender 3). You can get pretty cheap Ender 3 but you would have to spend quite a lot of hours (3-5 hours) assembling your printer and printing your first model. - Types of Heated Bed
Many printers have bed which offer magnetic removable covers which turns out to be very handy when you need to pop-off the printed part from the bed. Also, some cheap printers offer useless bed as they don’t even have enough traction and you might need to apply some glue externally every time you print to allow prints to stick to the base. Otherwise, your prints might fall down while printing. Ender 3 also provides magnetic mats which can be placed over heated bed and you can choose to buy glass bed as well which result in very fine base layer printing resulting in high finish but then, you can’t bend the glass bed to pop off the part as you may do in case of flexible magnetic bed. -
Octo Pi/ Print
Octo pi is essentially a raspberry pi image which has been forked out of project Octo Print. It is actually a project written in Python by a German software developer named Gina Häußge. Soon after developing Octo print, Gina made it open source and since then, it has become a synonym with 3D printing. Using a 3D printer without Octo Print seems like stone age now. All it provides is the ability to operate your 3D printer over a network. So you need not save your 3D models on a SD card and physically go to your printer to install SD card, initiate print… Nah, that all is history. Now you can connect your printer to a Raspberry Pi, which acts as interface and provides connectivity to your printer.You can even control your 3D printer over internet from any part of the world and monitor your print via webcam which you can install on Raspberry Pi, make cool timelapse videos using a plugin called Octo Lapse and so on. Now how it is important factor while deciding which printer to buy? Well, even today, not all the printers support Octo Print/Pi and thus it is important to pay heed to the fact whether you want to trade your comfort for some printer which doesn’t support Octo Print. You do not want to regret your decision later.
I hope this blog post has shed some light on different aspects of 3D printing.
You can post your suggestion, correction or question in the comments below.